โครงงานห้องเรียนอัจฉริยะ
ที่มาและความสำคัญ
ในปัจจุบันเทคโนโลยีได้เข้ามามีส่วนร่วมในชีวิตประจำวันของพวกเราทุกคน ในด้านที่สำคัญ คือ ด้านการอำนวยความสะดวกสะบายของมนุษย์ด้วยการนำเทคโนโลยีต่างๆมาประยุกต์หรือช่วยแก้ปัญหาเพื่อตอบสนอง ความสะดวกสบาย อันเห็นได้จากสิ่งประดิษฐ์และนวัตกรรม หลายๆอย่าง เช่น รถยนต์ คอมพิวเตอร์ โทรศัพท์มือถือ ที่สร้างขึ้นเพื่อความสะดวกสบาย
ในการเปิด-ปิดไฟพัดลมในบางครั้ง เด็กนักเรียนที่มีหน้าที่รับผิดชอบประจำวันที่ลืมปิดไฟพัดลม และมีนักเรียนจากห้องอื่นเข้ามาก่อความวุ่นวายภายในห้องขณะที่นักเรียนไม่ได้อยู่ในห้องเช่น ช่วงพักกลางวัน และช่วงย้ายไปเรียนที่ห้องอื่น ทำให้สิ่งของภายในห้องสูญหายหรือไม่ได้จัดวางไว้ที่เดิม ทำให้เกิดปัญหากับนักเรียนที่เป็นเจ้าของสิ่งนั้น
เนื่องจากสาเหตุนี้ เราจึงได้สร้างแบบจำลองการทำงานของ smart classroom ขึ้นมาเพื่ออำนวยความสะดวกสบาย ตรวจสอบนักเรียนที่เข้าภายในห้องและใช้เป็นแบบอย่างในการพัฒนาต่อเป็นสิ่งที่สามารถใช้งานจริงได้
วัตถุประสงค์
- เพื่อสร้างแบบจำลอง smart classroom
- เพื่ออำนวยความสะดวกสบายในการเปิด-ปิดไฟพัดลม และตรวจสอบนักเรียนที่เข้าออกภายในห้อง
วัสดุอุปกรณ์
- บอร์ด Raspberry Pi
- มอเตอร์
- หลอด LED
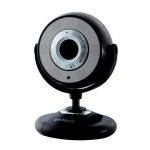
- กล้อง
-
- ultrasonic sensor


ผังโครงสร้าง
หลักการทำงาน
ใช้webcamในการแสกนใบกน้าแล้วเปิดประตูเมื่อเดินเขาไปในห้องจะมีเซนเซอร์ตรวจจับการเคลือนไหวถ้ามีการเคลื่อนไหวก็จะเปิดไฟจนกว่าจะไม่มีการเคลื่อนไหวและเมื่อจะออกจากห้องก็จะมีเซนเซอร์ ultasonic คอยเปิดประตูอัตโนมัติ
CODE คำสั่งการทำงาน
|
import RPi.GPIO as GPIO # import RPi.GPIO module
import time import face_recognition import cv2Minute_For_ON = 0.1 # % minutes for Fan On __FanOn = False bFanOn = False Forward = 23 Backward = 24 GPIO.setmode(GPIO.BCM) # choose BCM or BOARD GPIO.setup(21, GPIO.OUT) # set GPIO18 as an output GPIO.output(21, 0)#GPIO.setup(Forward, GPIO.OUT) # set GPIO18 as an output #GPIO.setup(Backward, GPIO.OUT) # set GPIO18 as an output # set GPIO18 to 1/GPIO.HIGH/True # This is a demo of running face recognition on live video from your webcam. It’s a little more complicated than the # other example, but it includes some basic performance tweaks to make things run a lot faster: # 1. Process each video frame at 1/4 resolution (though still display it at full resolution) # 2. Only detect faces in every other frame of video.# PLEASE NOTE: This example requires OpenCV (the cv2 library) to be installed only to read from your webcam.# OpenCV is not required to use the face_recognition library. It’s only required if you want to run this # specific demo. If you have trouble installing it, try any of the other demos that don’t require it instead. # Get a reference to webcam #0 (the default one) # Load a sample picture and learn how to recognize it. # Load a second sample picture and learn how to recognize it. # Load a second sample picture and learn how to recognize it. # Create arrays of known face encodings and their names # Initialize some variables #def forward(x): #def reverse(x): while True: # Resize frame of video to 1/4 size for faster face recognition processing # Convert the image from BGR color (which OpenCV uses) to RGB color (which face_recognition uses) # Only process every other frame of video to save time if process_this_frame: face_names = [] # If a match was found in known_face_encodings, just use the first one. face_names.append(name) process_this_frame = not process_this_frame if( state == 1 ): if( state == 2 ): # Draw a box around the face # Draw a label with a name below the face # Display the resulting image # Hit ‘q’ on the keyboard to quit! # Release handle to the webcam # Import required Python libraries
from _future_ import print_function import time import RPi.GPIO as GPIO# Use BCM GPIO references # instead of physical pin numbers GPIO.setmode(GPIO.BCM)# Define GPIO to use on Pi GPIO_TRIGGER = 23 GPIO_ECHO = 24 Forward = 25 Backward = 8 door = 0 # Speed of sound in cm/s at temperature temperature = 20 speedSound = 33100 + (0.6*temperature) print(“Ultrasonic Measurement”) # Set pins as output and input def reverse(x): while True: # Set trigger to False (Low) # Allow module to settle # Send 10us pulse to trigger while GPIO.input(GPIO_ECHO)==0: while GPIO.input(GPIO_ECHO)==1: # Calculate pulse length # Distance pulse travelled in that time is time # That was the distance there and back so halve the value else : GPIO.cleanup()
สิ้นสุดการสนทนาผ่านแชท
|
ผลของการทดสอบ
เราได้ทำการให้ผู้ทดสอบ มาทดสอบในการใช้กล้องเว็ปแคมจดจำใบหน้าและระบุชื่อเจ้าของใบหน้านั้น ผลปรากฏดังงนี้
| ครั้งที | ผู้ทดสอบคนที่1 | ผู้
ทดสอบคนที่2 |
ผู้ทดสอบคนที่3 | ผู้ทดสอบคนที่4 |
| 1 |
|
 |
|
|
| 2 |
|
|
|
|
| 3 | |
|
|
|
| 4 | |
|
|
|
| 5 | |
|
|
|

วิธีการดำเนินการ
1 กำหนดปัญหาที่ต้องแก้ไข
จากการสังเกต พบว่ามีนักเรียนผู้รับผิดชอบเวรประจำวันหลายห้อง ลืมปิดไฟ พัดลม และมีนักเรียนต่างห้องเข้ามาทำให้สิ่งของสูญหาย จึงทำให้เราต้องการที่จะจัดทำโครงงานนี้ขึ้นมาเพื่อแก้ไขปัญหานี้
2 ทำการรวบรวมข้อมูล
เนื่องจาก เราต้องการจะทำที่เกี่ยวกับบอร์ด Raspberry Pi และเว็ปแคม ดังนั้น ข้อมูลที่ เราต้องศึกษา ก็คือข้อมูลเกี่ยวกับบอร์ด Raspberry Pi และเว็ปแคม บอร์ด Raspberry Pi คือ เครื่องคอมพิวเตอร์ขนาดจิ๋ว ที่มีขนาดเพียงเท่ากับบัตรเครดิต ที่สำคัญคือ ราสเบอร์รี่พายนี้มีราคาที่ถูกมาก เมื่อเทียบกับคอมพิวเตอร์เดสก์ท็อปปกติ คือมีราคาเพียงแค่หนึ่งพันบาทแต่สามารถทำงาน ได้เหมือนเครื่องคอมพิวเตอร์ทุกอย่าง เราสามารถต่อราสเบอร์รี่พายนี้เข้ากับจอคอมพิวเตอร์หรือ จอทีวีที่รองรับ HDMI หรือถ้าไม่มีพอร์ต HDMI ก็ไม่ต้องกังวล สามารถต่อผ่านสายสัญญาณวิดีโอปกติ (เส้นสีเหลือง) แต่ความละเอียดอาจจะต่ำกว่า เซนเซอร์ คือ อุปกรณ์ตรวจจับสัญญาณหรืองปริมาณทางฟิสิกส์ต่างๆ
3 เลือกวิธีที่จะทำการแก้ปัญหา
ต้องการที่จะทำแบบจำลองห้องเรียนเพื่อใช้ในการอำนวยความสะดวกสบายในการเปิดปิดไฟ พัดลม
4 ทำการออกแบบและลงมือปฎิบัติ
ใช้ภาพร่าง 2 มิติในการอออกแบบตัวเครื่องจ่ายไฟอัตโนมัติและใช้ภาพ 3 มิติในการออกแบบโมเดลขึ้นเป็นชินงานต้นแบบ จากนั้นก็ลงมือปฎิบัติตามแผนที่วางไว้
5 เริ่มทำการทดสอบแบบจำลอง smart room
เริ่มทำการทดสอบแบบจำลอง smart roomโดยนำเซ็นเซอร์จับการเคลื่อนไหวมาคอยควบคุมการเปิดปิดประตู และใช้กล้องเวบแคมในตรวจจับใบหน้าเพื่อตรวจสอบผู้เข้าออกในห้อง
6 ทำการปรับปรุงแก้ไขปัญหาที่เกิดขึ้น
ปัญหาของพวกเราก็คือมอเตอร์ไม่ทำงานเนื่องจากกำลังไฟไม่พอพวกเราคณะผู้จัดทำจึงได้นำRelayมาช่วยเพื่มกำลังไฟ
7 ทำการประเมินผลที่ได้มา
เราได้ทำการทดลองโดยการใช้กล้องเวปแคมในการตรวจจับใบหน้า ผลปรากฏว่ากล้องเวปแคมสามารถตรวจจับใบหน้าได้ค่อนข้างแม่นยำ
คณะผู้จัดทำโครงงาน
- ด.ช.ณัฐวัฒน์ ด้วงเงิน
- ด.ช.ภูชิต เกตุสมบูรณ์
- ด.ช.อภิวิชญ์ ปาลิกา
อาจารย์ที่ปรึกษา
ครูอภิชาติ ชัยชนะ สอนวิชา คอมพิวเตอร์
โทรศัพท์ 0812743551 อีเมล chaicha.ap@gmail.com
ครูนารีรัตน์ อินอิว สอนวิชา คณิตศาสตร์
โทรศัพท์ 0885269988 อีเมล ineiw2525@gmail.com
โรงเรียนพุทธโกศัยวิทยา
ที่อยู่ของโรงเรียน โรงเรียนบ้านนา”นายกพิทยากร”